Screaming Frog 2021 Complete Guide
The Screaming Frog 2021 Complete Guide is a simple tutorial that will get you started with the Screaming Frog SEO Spider - a versatile web debugging tool that is a must have for any webmaster’s toolkit. From beginners to veteran users, this benchmarking tool provides step-by-step instructions for applying SEO best practices.
What is Screaming Frog?
Screaming Frog is a software you can use to crawl a website and it basically tells you what's wrong with the website that you’re crawling. This is really good if you’re trying to offer services to a company that needs help with their websites and for instance, a client is having problems in figuring out lapses in their website, this tool can help you to identify what's wrong and what needs to be done.
Before we proceed, if you’re a more visual learner, you can check out this video that tackles the same topic as what we’re about to discuss in this article:
Installation
To get started, download and install the SEO Spider, which is free and allows you to crawl up to 500 URLs at once. It runs on Windows, Mac OS X, and Ubuntu. Simply click the download button to get started: Download Now. Now you may get the file.
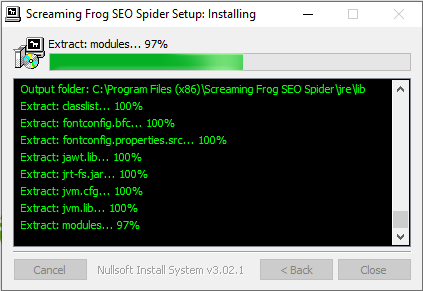
Then, double-click the SEO Spider installation file you have downloaded and follow the installer's instructions.
You can purchase a license to remove the 500 URL crawl limit, expand the setup options, and gain access to more advanced capabilities. Visit compare free vs. paid features, go to their price page.
Is Screaming Frog Worth It?
One thing to take note of with the free version is the fact that you can’t do Google Analytics Integration and Search Console Integration. The problem with not being able to do those things is that you’re going to have a harder time being able to pull all the analytics into the crawl.
However, in this guide, I will be using the free version since we don’t really need the paid version because a lot of the things can be done without having Google Analytics or Google Search Console integrated.
Once you found your footing and you need to do a lot of audits, you’d probably have to get the paid version but if you’re just starting out and you’re just trying to get some basic local websites crawled and figure out what’s wrong with them.
Generally, if you’re just starting out, you’re only going to be wanting to work with local clients because it’s easier to rank those sites than to do something national or handle a mega-site. So I would recommend just getting the free version and eventually after you do a couple of audits, you can start charging for them and the audits will then pay for the tool.
Screaming Frog: How Do I Use It?
In order for me to give an easy to understand explanation of how Screaming Frog works, I will be using a template that I made:

How to crawl an entire site
It's a good idea to examine what kind of information you're looking for, how big the site is, and how much of the site you'll need to crawl in order to get it all before starting a crawl. When crawling larger sites, it's sometimes best to limit the crawler to a subset of URLs in order to gather a decent representative sample of data. This makes file sizes and data exports a little easier to control. Below, we go over this in greater depth. To get started crawling your entire site, including all subdomains, you'll need to make a few minor changes to the spider setup.
Screaming Frog only crawls the subdomain you enter by default. Any further subdomains encountered by the spider will be treated as external links. You must update the parameters in the Spider Configuration menu to crawl more subdomains. If you select 'Explore All Subdomains,' the spider will crawl any links it discovers to other subdomains on your site.
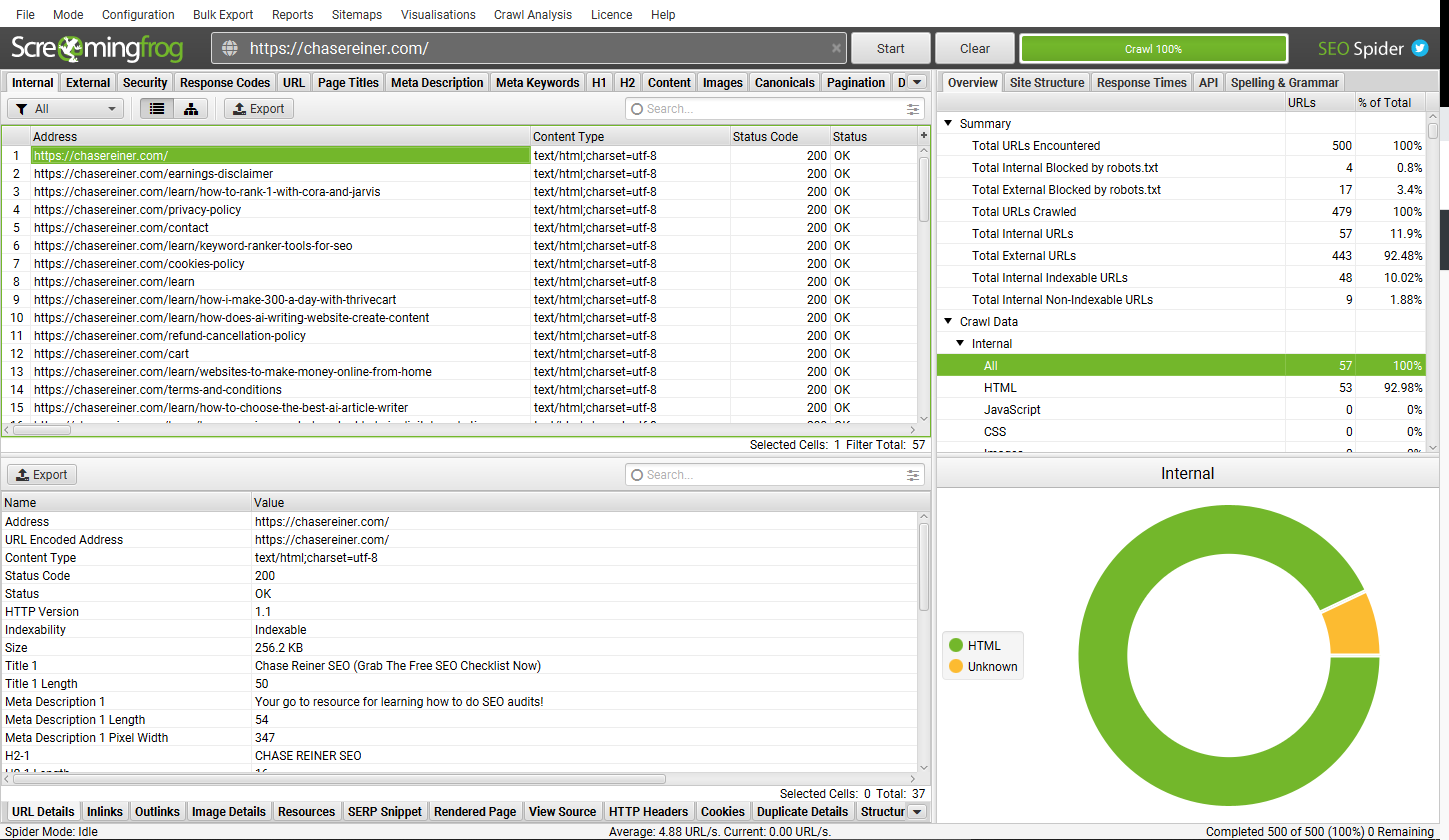
To put things into perspective, let’s use my website, chasereiner.com, and press start. What you’ll see when you begin is all of the URLs show up on your crawl, these are all the different things on the website.
Now there’s a bunch of different filters that you can use:
HTML
JavaScript
CSS
Images
PDF
Flash
Generally, you’re going to be filtering by HTML since you just want to see the pages that are on the website so you don’t really care too much about the images or the PDFs, you can do that if you’re trying to see if they have certain things on the website like pdfs but for the most part, you’re going to filter by HTML so you can see all of the HTML pages on the website.
Now before I go into what you’re going to want to look at in terms of all the different errors, let me just go over the first row.
File
At the top, we have “File”. This tab will be used when you want to open a recent crawl that you’ve done. So if you save a crawl or you want to load a crawl that you’ve done, you can do that. There’s also the “Save” tab where you can manually save a crawl or press “Control” + “S” for the shortcut.
Configuration

The “Configuration” button is used if you want to load a certain layout or a certain type of crawl. If I change the columns on the template, it’s supposed to be able to save these columns and then load that configuration and it will go by the columns that you’ve sorted. This also has a feature that can load other presets that you’ve had. I’m still not 100% familiarized with the Configuration feature but I believe that these are all the different things that you can configure, the speed of the crawl, certain types of links, Google Analytics, Google Search Console, etc.
Scheduling
This tab is a licensed feature that is used if you want to schedule crawls. You can choose the crawl mode (spider or list), save the configuration, and use APIs (Google Analytics, Search Console, Majestic, Ahrefs, Moz) to pull in any data for the crawl. You can also automatically save the crawl file and export any of the tabs, bulk exports, reports, or XML Sitemaps to a chosen location.

In using scheduling, there are a few things to keep in mind.
There's no need to save crawls in scheduling if you're using database storage mode because they're saved automatically in the SEO Spiders database. Crawls can be accessed via the application's 'File > Crawls' menu after the scheduled crawl has been completed. Please review our tutorial on how to save, open, export, and import crawls.
For a scheduled crawl, a new instance of the SEO Spider is started. As a result, if multiple crawls overlap, multiple instances of the SEO Spider will run at the same time, rather than waiting for the preceding crawl to the finish. As a result, we propose taking into account your system's resources as well as crawl timing.
When data is scheduled to be exported, the SEO Spider will execute in headless mode (that is, without an interface). This is to avoid any user involvement, such as the application starting in front of you and prompting you to select options, which would be weird.
This scheduling is done through the user interface; if you'd rather operate the SEO Spider through the command line, read our command-line interface guide.
Spider
This tab is used if you want to only crawl certain types of things like Images, CSS, certain types of Links, AMP, Pages, and Extractions. In the case of Extractions, for instance, not extracting page titles or not extracting meta descriptions, you could change that here.
Limits

This is how many pages you might want to crawl on a website. How deep you want to go into the website with crawl depth which basically just means how many links you’re going to follow into the website. Speaking of limits, Screaming Frog has a 500 URL limit for the free version.
Rendering
I haven’t got the chance to get fully immersed in this feature yet but as far as I know, these are the different things that you can force. For instance, if there’s no index tag on a page, you can respect no index, basically what that means is that the robot won’t go and actually crawl those pages that aren’t indexed or if you have a canonical, meaning your one page is pointing to another page saying that page is about that page, then it’s going to say “Okay, well we’re going to crawl that page”, so you can actually do more advanced actions in here.
However, I would generally leave all these at default so you can actually choose what you determine as a good thing or a bad thing. There are defaults in this and one of them is H1 length, alt text, character length, image size, low content word count, etc. You can basically set a standard for your crawler.
Content Area

This feature is used for word count, duplicated content, spelling, and grammar. I haven’t got the chance to dive into this feature fully but I’m guessing this tab looks for duplicate content. I'm not really sure if I would personally use this, I haven’t done a lot of experimenting with it but my favorite tools are the tools that are actually specifically built for a specialized feature.
I’m not sure if I would trust Screaming Frog for content, especially duplicate stuff. I also don’t think they have any way of checking external content too, meaning those content on a website that isn’t your own.
What I like to use when it comes to this is Siteliner. The website lets you see all your internal duplicates and then copies get to escape and let you see all of your external. So if anybody has put your content on their website, you’d know.
Robots Settings
Screaming Frog’s Robot Settings show internal URLs blocked by robots. This will show you the different errors for robots.txt or if anything’s blocked.
CDNs
You can use the CDNs feature to specify a list of CDNs that will be considered as 'Internal' throughout the crawl.
You can specify a list of domains that should be treated as internal. You can also include a subdirectory with the domain to make the subfolder (and its contents) internal.
'Internal' links are then added to the 'Internal' tab instead of 'external,' and more information is collected from them.
This is where you can test whether or not CTN CDNs work or not. This is like a content delivery network.
API Access

A lot of this stuff in here I’ve never really spent a lot of time on but the biggest thing you really want to look for is the API Access. This is really cool because if you eventually purchase the paid version of Screaming Frog, probably one of the most helpful things that you’ll be able to use is the Google Analytics, Google Search Console, and Ahrefs. You can actually export how authoritative the pages are and how much traffic they are getting and what kind of click-through rates they are getting.
If you go to Google Analytics, you can connect your account. What you can actually identify is how many sessions this page has, the bounce rate, and the Google Analytics site speed test. This is really helpful because when you’re doing audits on a large scale it is nice to be able to see the traffic for all these different pages as well as the different analytics data like average session duration, bounce rate, conversion rate, etc.
Google Search Console
When you hook this up, it gives you a click-through rate and impressions for the page and so on. You end up getting these after you do a crawl you get hundreds of tabs that show about ten or twenty tabs from Google Analytics that show you data that you won’t normally get just from a regular crawl but obviously, you do have to have Google Analytics and Google Search console hooked up to the crawl in order for it to do it, which means you have to have the logins to those or at least some sort of edit access to those in order to hook them up to Screaming Frog and then with Ahrefs or any of these other tools like Moz.
Screaming Frog will show you the authority of those pages as well so how powerful they are which is kind of cool.
Columns
In the event that you want to see your status code errors first or if you want to see the content types first or the title tags. You can rearrange all of the data and when you export it, it’s really helpful to have it all lined up. Again, the problem though is I don’t know if they save these layouts anymore.
Reports
This feature gives you reports on all the different things that are very similar to bulk export except it just shows you different issues that might be going on with things like page speed, more of the technical errors.
Site Maps

This will give you an Excel XML Sitemap of your website if you want to grab that.
By default, the SEO Spider does not crawl XML Sitemaps (in ordinary 'Spider' mode). This setting must be enabled in order to crawl XML Sitemaps and populate the Sitemaps tab's filters.
You can select 'Auto Discover XML Sitemaps using robots.txt' or provide a list of XML Sitemaps by ticking 'Crawl These Sitemaps' and pasting them into the form that appears when the 'Crawl Linked XML Sitemaps' configuration is enabled.
Please keep in mind that once the crawl is complete, you'll need to run a 'Crawl Analysis' to populate the Sitemap filters.
Visualizations
Crawl visualizations and directory tree visualizations are two forms of interactive website visualizations available in the Screaming Frog SEO Spider.
The two sorts of visualizations are essentially distinct and serve different purposes in terms of comprehending a site's architecture. This tutorial will explain the distinctions and show you how to use each one.
There are two distinct styles for each visualization type: a force-directed diagram and a tree graph. The format type chosen can just be a matter of personal preference, but the 'optimal' format to employ can also be determined by the size of the site and the situation. Continue reading our tutorial below or watch our movie on visualizations.
While visualizations are appealing and entertaining, they don't add to the amount of information provided in a crawl. They aren't necessarily the most accurate technique to diagnose problems, and they don't always give the complete story.
Visualizations, on the other hand, have the ability to provide perspective, explain ideas, and reveal underlying patterns that are difficult to detect in data and spreadsheets.
Crawl Visualizations

The visualizations' force-directed crawl diagram' and 'crawl tree graph' show how the SEO Spider crawled the site the quickest path to a page. They display the quickest path to a page starting at the start URL. They don't reveal every internal relationship because it makes visualizations difficult to scale and understand.
If a page has numerous shortest pathways (i.e., many links from the same lowest depth), the link that is displayed is the one that was crawled first, which is usually the one found first in the source code.
The crawl visualizations are organized by crawl depth, with the quickest path represented by the lines connecting URLs. The crawl visualizations are therefore valuable for analyzing site design and internal connectivity.
Directory Tree Visualizations

The visualizations' force-directed directory tree diagram' and 'directory tree graph' depict a website's URL architecture. The components of URLs, from protocol to host and path, organize the nodes (circles). Nodes may not always represent resolving URLs, and lines do not indicate hyperlinks, unlike crawl visualizations.
The lines between URLs represent the directory path, and the directory tree visualizations are hierarchical by URL component and path. As a result, directory tree visualizations are handy for analyzing a website's URL structure and overall information architecture.
This approach also makes it easier to discover errors, because URLs that share the same directory frequently have the same template.
Page Title Tab
The page title tab contains information on the page title elements of internal URLs crawled. The filters display the most common problems with page names that have been detected.
The page title, often known as the 'title tag, "meta title,' or 'SEO title,' is an HTML element in the head of a webpage that informs users and search engines about the page's purpose.
They're commonly regarded as one of a page's most powerful on-page ranking signals. The page title element should be placed in the head of the document and looks like this in HTML:
<title>This Is A Page Title</title>
Final Thoughts
Again, if you want to get the paid version of Screaming Frog you can most definitely check that out here. Finally, that’s it for the basics of Screaming Frog. I might do a series in the future where I do audits with Screaming Frog so you can catch me live on my YouTube Channel.
Also, I would definitely recommend getting into my mastermind group where I have all of my templates. By joining the group, you will get weekly live classes, excellent support system, and access to Shine Ranker together with its subscription.